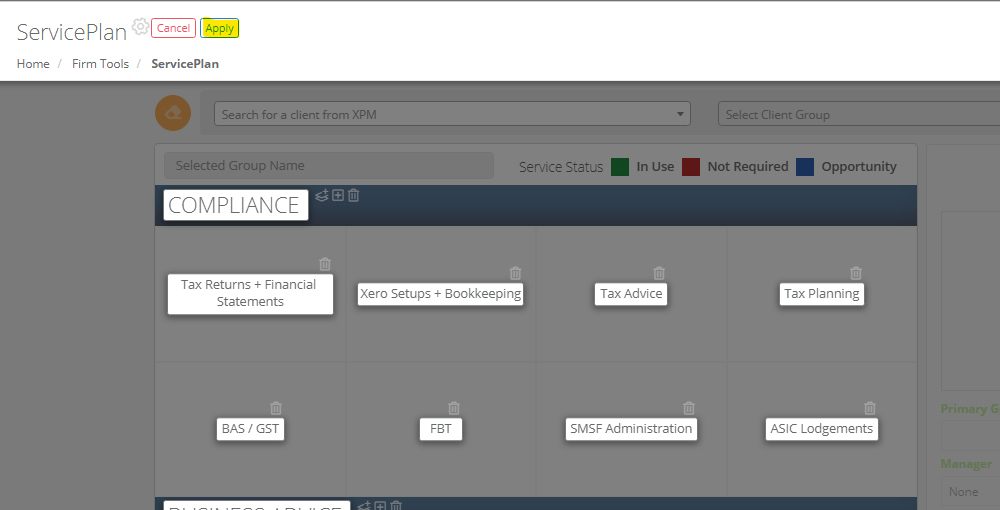
The Service Plan matrix is populated with default values which you can add to, change or delete to customise it to your firm's needs
Step by Step:
Open the Setting Editor
(Users with Administrator Access can do this)
Navigate to CORE - Client > Service Plan and click the cog icon beside the title to enter the edit mode

Customise the Sections
On the right hand of your 'Section Headings', you have options to:
- Edit the name of that section
- Add a new section of service tiles (note - new sections will be placed underneath the current section)

- Add a new service tile to that section

- Delete the entire section of service tiles

Edit the Service Titles
On each 'service tile' you have options to:
- Edit the tile name (maximum text length of 50 characters)
- Delete service tiles

Organise your sections and tiles
Using drag and drop you can organise your SECTIONS and your TILES to create your own custom layout to the Service Plan, as illustrated below.
Review and apply your changes
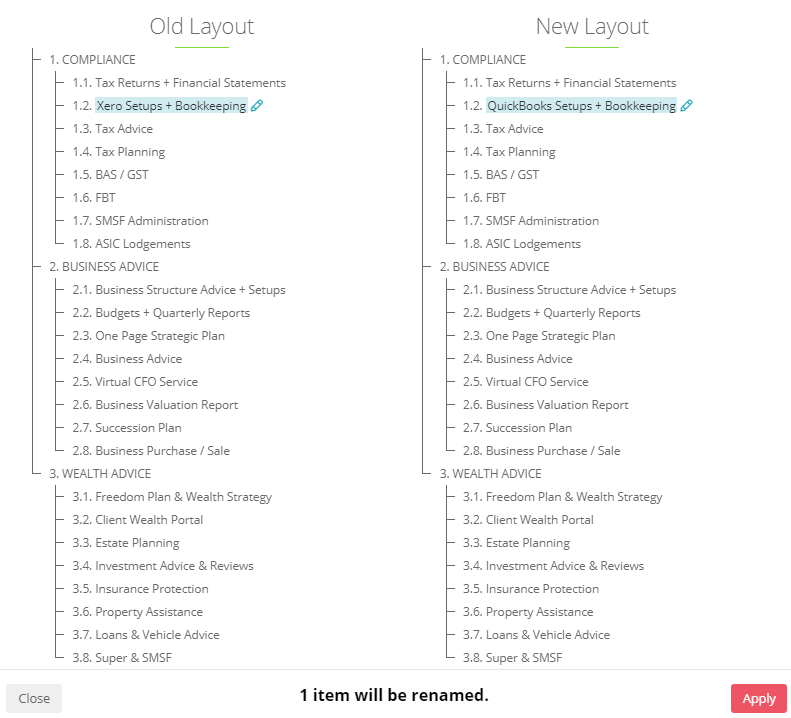
Follow the images and steps below to review and apply your custom layout, for the entire team to use

- Click the 'Apply' button at the top of the page to open a 'Review' prompt.
- Review the changes carefully (NOTE: reverting after saving changes will be a manual process)
- Click 'Apply' and confirm once 100% sure of your changes.

